How to choose your travel camera
Last Updated July 5, 2024
Taking some pretty travel photos, photos that remind you of good memories, photos that make you smile, can seem difficult or inaccessible due to the price and the complexity of photo gear. No need to panic! In reality, it is not that complicated. My golden rule: chose gear that is adapted to your level. Here is a little guide on how to choose a travel camera that will come with you all around the world depending on your level, and on the accessories you might need, based on my experience since my beginnings with photography almost 10 years ago!
This article contains affiliate links, which allows me to earn a small commission on any purchase you make through my links, at no extra cost to you. It helps me keep this blog running  thanks for understanding!


I started taking photos at a quite early age. Always observing my father immortalising moments during our walks, our trips, our afternoons with the family, I wanted to do just like him. I first started with a small compact camera I got for my 13th birthday, photographing anything and everything, but paying attention step by step to the composition of my photos. During my last year at middle school, I was lucky enough to participate in a workshop where I discovered major photographers such as Henri Cartier-Bresson, Jane Evelyn Atwood and many others.
Their work had sparked my interest, so I decided to learn more about the different techniques in photography, and the settings available such as shutter speed, ISO sensitivity and mostly iris aperture, which allows to control the depth of field and to get this beautiful, blurry background. My little compact camera wasn’t enough anymore!
After training for a few months on my dad’s bridge camera, I got my first DSLR camera, and what a revolution that was!! I started really enjoying and having fun taking photos, especially while I was travelling. Until recently, I was using my entry-level DSLR camera to take travel photos and it is only at the end of 2020 that I invested in a more professional and modern camera (finally enjoying integrated Bluetooth and Wi-Fi and the beauty of automatic transfers!).
Choosing a travel camera depending on your photography level
Beginner: smartphone
Yup! A smartphone is more than enough to take travel photos when starting with photography! Smartphones’ lenses have really developed in the past years and you can now get really good results with them. I myself use quite often my phone when I don’t have my camera with me! Start learning about the different composition rules and techniques and train on your phone. Pay attention to the perspective, to the light, and more generally to how the environment is moving around you. The same scene taken several seconds apart can result in two very different photos! Your smartphone is the best travel camera to start with 🙂
All the photos below were taken with my iPhone SE (1st generation), you can click on them to see each of them better. I think they are pretty good for photos taken with a phone! All that mattered was the light and the angle at which I took the photos.


And here are some examples of photos taken with the iPhone 12 mini. Can you tell the difference with the photos taken below by DSLR & mirrorless cameras? If you can’t, a phone as a travel camera is definitely enough for you!


Intermediate: entry-level DSLR camera
When you will start feeling limited with your smartphone, it’s time to change to a DSLR camera! I must insist on the term ‘entry-level’ because this kind of camera is easy to manipulate while still taking high-quality photos, it will help you improve your photography skills really quickly. My first DSLR camera was a Nikon d3100 with an 18-105mm lens, and I later on got a Nikon d5100 with an 18-105mm lens too after being unfortunately robbed.

Having used this camera for several years, there are a few things I would like to share about it. First of all, it is a very good camera for beginner and intermediate photographers which, as I mentioned before, followed me until very recently! Its body is very easy to manipulate, it is compact so light enough to take it everywhere with you, and its battery life is great.


However, I didn’t choose my first lens well. I went for the 18-105mm, thinking that a “longer” zoom (compared to the 18-55mm kit lens) could be useful and that the quality would be better. What I didn’t think about, was that this lens was much heavier than the 18-55 (twice as heavy!) which made my camera more difficult to transport (it weighted 1KG in total). Result: I didn’t use my camera very often. And I was never using the zoom at 105mm. I also noticed quite quickly that the quality of my images was limited.

I then searched about options regarding weight and quality optimisation, thinking first that I would have to change camera to have something that would suit my needs better. But while surfing on different forums, I understood that the problem didn’t come that much from the body of my camera but rather from the lens and that by updating to a higher quality lens (and not using the kit lenses 18-55 or 18-105mm!), especially a fixed focal, I would be able to further improve my skills.
I decided to go with the 50mm 1.8, which was described as “very close to the human eye” and ideal for travel and street photography while being very luminous. Everything seemed perfect about it. But what a mistake that was! As soon as I first tried it, I realised that the shot was really tight and it was close to impossible to photograph anything in the streets. What I didn’t take into account was that the advice I read was for full-frame cameras, while mine was an APS-C (all entry-level cameras are like this, I recommend you to learn about the difference between the two, it’s important to know the equivalences for each lens). My 50mm was in reality equivalent to an 85mm FX (in the Nikon system), a lens mostly used to shoot portraits…


Photos taken at 18mm, 35mm and 50mm
The right choice was actually a 35mm (equivalent to a 50mm full-frame) to get the results I was looking for. And this time, I was not disappointed. My 35mm 1.8 followed me all around the world, and with it, I immortalised cities and landscapes, and many beautiful moments during the 5 years it was by my side.


The only drawback is that the shot is still quite tight and in certain situations, I wasn’t able to shoot a whole scene if I couldn’t get enough distance. For example, at the foot of a tall building, or of a beach with high cliffs, it was difficult to get everything in the shot. Apart from this detail, it is a versatile lens that will allow you to develop your creativity, I highly recommend it!
To sum up: choose an entry-level camera, no need for more, but choose your lenses carefully. Pay attention to their weight and format! If I had to start all over again, I would start with an 18-55mm to understand which focal length I like the most. The latest version of the Nikon d5100 is the Nikon d5600.
Advanced/pro: professional DSLR or Mirrorless camera
After many years using my d5100 and thousands of photos later, I decided it was time to move onto some more professional gear. With time, I realised I was missing some features and I didn’t like anymore the way my photos looked straight out of the camera. I was spending a lot of time editing them, and I always ended up sharing almost none of them on social media. I wasn’t doing anything with my photos, I was barely looking at them (apart from the ones I had uploaded here on my blog).
I searched for months for my dream camera at the two leading players in the market, Nikon and Canon, convinced that I needed a full-frame camera from one of the two brands since most well-known photographers today had one or the other. But it was impossible to find what I was looking for: all cameras were either too expensive (without even talking about the price of the lenses on the long run), either too big and too heavy, made for either photo or video, anyway, none were matching my criteria.
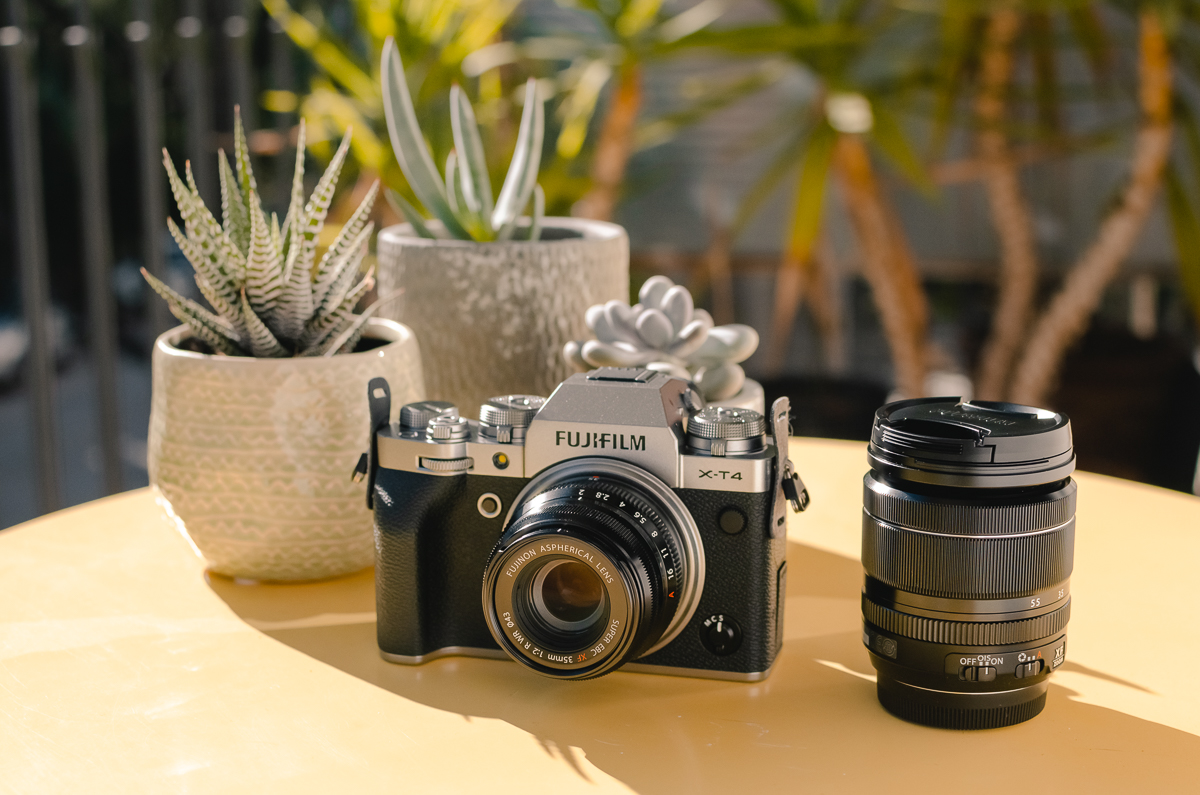
That was until I found a video talking about Fujifilm’s X series. And it was love at first sight! Not only is the vintage design of the cameras really cool, but the performances are also pretty impressive. All cameras from the Fujifilm X series are APS-C mirrorless cameras, which makes them more compact and less heavy! I personally chose the most recent Fujifilm X-T4, which has an internal optical stabilisation (before that, only a few lenses of the brand had optic stabilisation) and allows to film beautiful scenes even while walking. What a change compared to my small d5100!

Other interesting features: there is film simulation integrated into the camera, and you can directly correct some parameters such as tints, contrast, highlights and shadows… You can also create your own films and save them in your camera, and have ready to use JPEGs as soon as you shoot them! I also like the Wi-Fi and Bluetooth connection between the camera and my phone, I can now directly export my photos there through the Fujifilm app. A life changer! I use the X-T4 with the 18-55mm kit lens (though it is nothing like other kit lenses, this lens is really high quality, I’m loving it so much!) and the 35mm f2. Both these lenses are really good for travel photos! The next lens on my list is a 16mm, but until then, what I have is more than enough.

")
The two photos above are some of the first shots I took with the Fujifilm X-T4 and they are unedited! For a photo straight out of the camera, I find the colours absolutely beautiful, at least they match my style 🙂
If you have a Fujifilm camera and are interested in these customisable film simulation, also called Fujifilm recipes, have a look at the blog FUJI X WEEKLY, they explain everything there!
To sum up: there is a really large choice of professional camera gear out there that are great for travelling, between full-frame cameras, mirrorless full-frame cameras and mirrorless APS-C cameras, the choice belongs to you and depends on your main needs and your workflow!
Accessories and other travel camera gear I use
GoPro 7 black
The GoPro 7 black is great for underwater shots, for videos and even photos when I don’t want to/can’t carry my camera. GoPros are very compact (they fit into your pocket), and easy to carry around everywhere! I wouldn’t use it as a main travel camera though because taking photos with it is not that comfortable and the settings are limited.
Tripod
I use the Manfrotto Compact Light, the name suits it well. It’s really compact and not heavy (less than 1KG), it easily fits into a medium size backpack. The best tripod for light travel!
SD card
I personally use this 64GB SD card from Lexar, it’s great while not being too pricey. Be careful about the SD cards compatible with your camera if you want to enjoy its capabilities at the fullest! For example, my old SD card (a basic, 16GB Samsung SD card) doesn’t work properly with my Fujifilm X-T4 when recording videos.
External hard drive
Don’t forget to take an external hard drive with you to export your photos and videos when travelling. SD cards get full quickly, especially if you don’t have time to select your photos. This external hard drive from Western Digital is small and light, I take it with me everywhere. A piece of advice: buy a case to protect your hard drive in your bag, it is something I forgot to do when I first got mine and it is now all scratched (and I had to buy a new cable because mine got ruined in my bag).
Protective shell
A protective shell protects your camera from impacts in your bag, from dust, from the rain… I prefer to travel light and a travel camera bag doesn’t make it on my packing list! I put my camera straight into my handbag, it’s less bulky. But handbag = holdall, so your camera must be protected, it would be sad if it were to be ruined by your keys. Of course, I speak from experience, I used to throw in my camera, my wallet, my phone, my external hard drive, my water bottle, some food, my keys, and all the stuff I picked from the road without paying attention at all to what was going on in my bag. I just figured everything was staying put and my stuff couldn’t hurt one another. But well, if you have a look at my stuff today, you will see that unfortunately, it’s not in the best shape. I’m glad I’ve learnt since then.
Screen protection
There’s nothing better than a screen protector to keep your screen from getting scratched and have it look brand new!
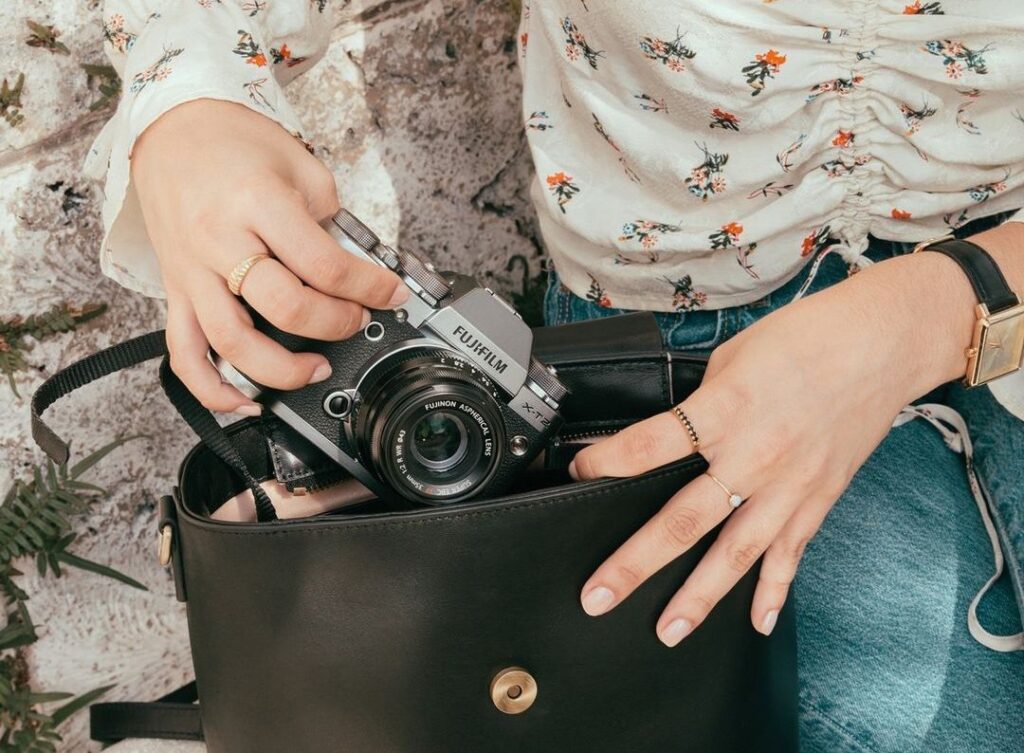
Handbag
I don’t use any camera strap to carry my camera, although I absolutely love all strap designs available on Etsy, I just don’t find it very handy. I like to have my camera in my hands and to be able to take it in and out easily. After searching for quite some time for a cross-body bag made for cameras, I discovered the brand Gatta, which makes for several years some really beautiful designs of camera bags for women! I love the Lola Noir, which doesn’t look at all like a camera bag! It’s perfect to travel with style 🙂
For more camera bag ideas, feel free to check my guide on the best camera bag for women who travel! I made a list of nice shoulder camera bags and camera backpacks too.
Backpack
If I need to carry more things with me, for example when I take my tripod with me, I use this backpack from the brand Kapten & Son, I love its refined design that goes with everything!
Polaroid
I got an old Polaroid Supercolor 635 at a bric-a-brac which I sometimes take with me, I love the vintage effect and the fact that it’s instant. If you are looking for a more modern one, have a look at the large Instax range from Fujifilm, they have two different formats: portrait and square. They even have some vintage looking polaroids which are really cool too!
Polaroid printer
And finally, if you like polaroid but prefer to choose which photo you want to print or not, there are polaroid printers like the Instax mini Link (portrait) or the Instax Share (square). It’s great to print travel photos straight from your phone or Fujifilm camera! I also use the website fujifilmcreate.co.uk to print my photos, prices are affordable and the quality is good.
Here are my tips to help you choose your travel camera (or even your everyday-camera)! I hope this guide helped you, and that you are now ready to travel the world and photograph your adventures. If you have any other tip to share, I would love to hear about it! Please leave a comment at the bottom of this article 🙂